Coconut butter

30 July 2014

Apologies for the absence. We've finally moved, and the past week has been a hectic blur of packing, cleaning, moving, cleaning, unpacking, waiting on deliveries/connections, and starting uni. It's now just barely under control (we still don't have an Internet connection), so here's a post that I prepared earlier. I meant to take a few more photos, but I'm sure what I've got will do.

Coconut butter is like peanut butter, but made with coconut. It's expensive to buy, but cheap and easy to make, and very tasty.

Coconut butter

Most online guides I've read indicate that ordinary blenders (i.e. not in the Vitamix/Blendtech range) can't successfully make coconut butter. I tried it in my KitchenAid (a mid range blender) anyway, and it worked. However, if your blender is a cheapie, you might need to use a food processor.

Coconut butter

Ingredients
  • Shredded coconut
Seriously, that's it. I haven't tried, but apparently flaked coconut works better, while desiccated has too much moisture removed so it doesn't work. I make a 500g bag's worth at a time

Method
  1. Tip the coconut into a food processor or blender. If it doesn't all fit, add as much as will fit, pulse a few times to compress what's there, then add the rest. Keep blending until it's smooth. I've got some photos of the stages here. If your blender/food processor is getting hot, you may need to give it a break for 30 minutes or more, just don't leave it so long that the butter starts to solidify, especially in winter, or you'll probably kill your machine. 


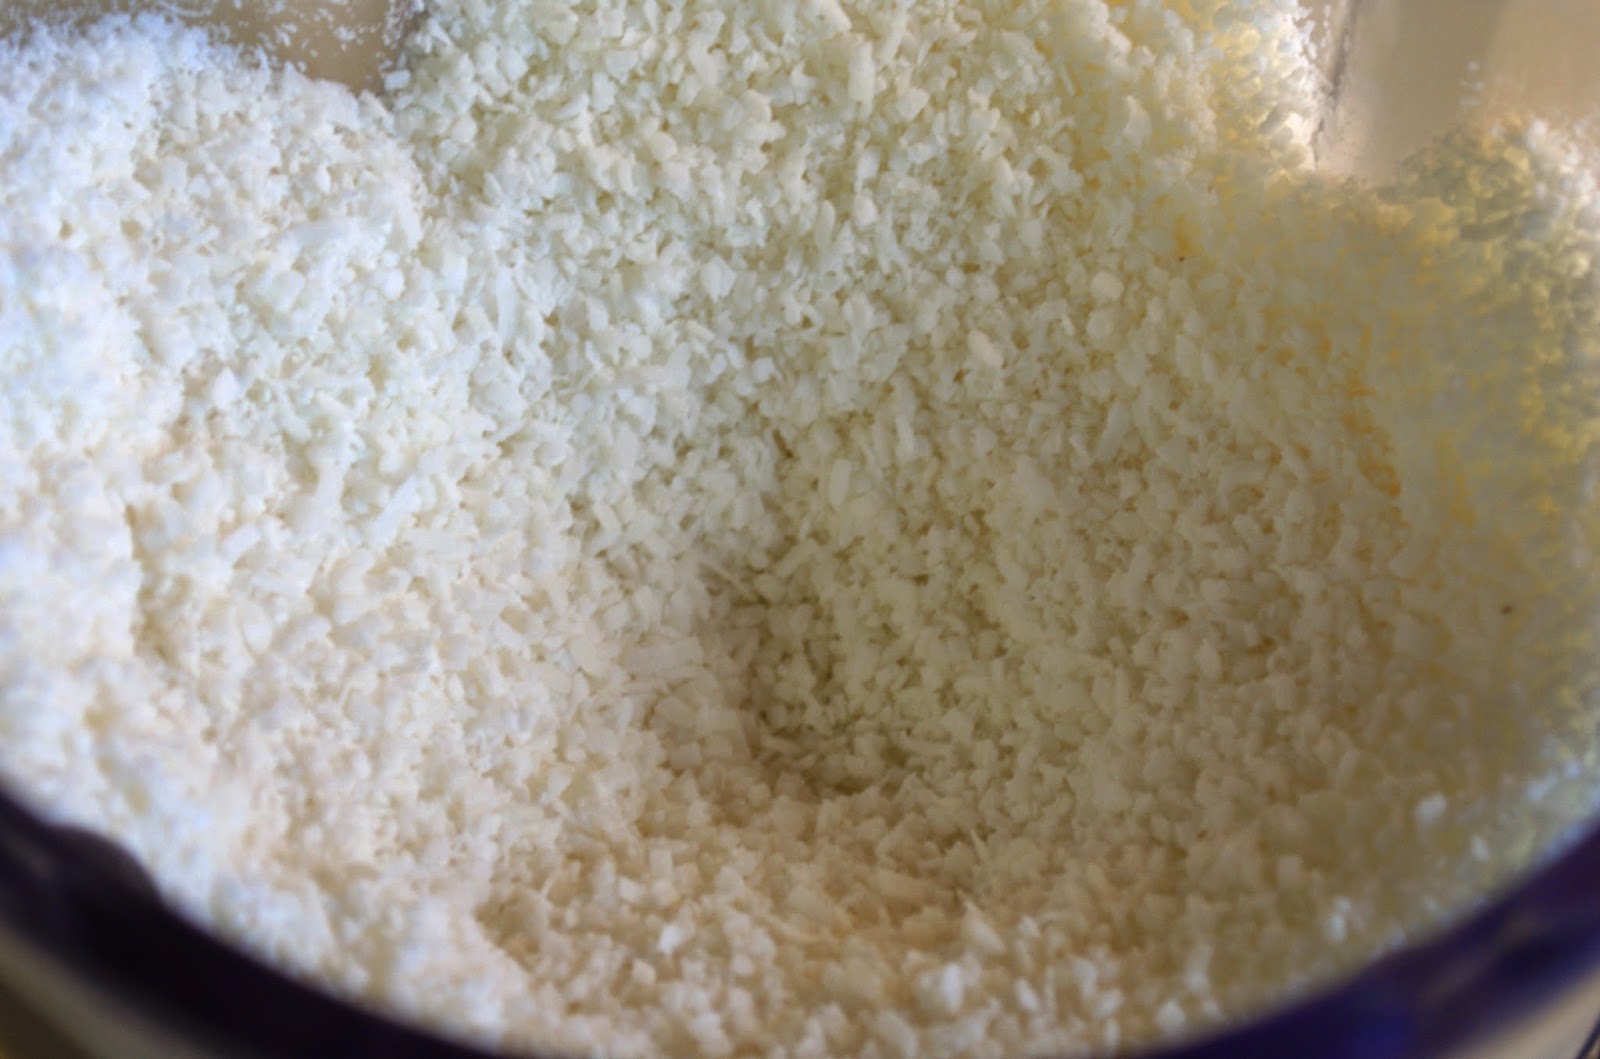
Making coconut butter - the coconut
Unprocessed shredded coconut

Making coconut butter - finely chopped coconut
Finely chopped coconut

Making coconut butter - starting to clump
The oil is starting to release. As it progresses here, it may get to the point where the coconut just builds up on the sides and stops falling into the middle. You can turn the blender off, and push the coconut into the middle, or, if you're impatient, you can carefully, use the back end of a wooden spoon to gently nudge the coconut clumps towards the middle, making sure to keep the spoon well clear of the spinning blades. I find that it takes way too much time if I keep turning it off, but if you ruin your blender, I take zero responsibility.

Making coconut butter - starting to liquefy
After a bit more time, it will go liquid enough that it no longer needs assistance, but is still very grainy. You can start gradually upping the speed towards maximum speed now.

Making coconut butter - looking smooth
Then it will start to look smooth. However, you still need to keep blending for a good bit of time after it starts to looks smooth before it actually approaches smooth. Every now and then, stop it and dip a spoon in to taste test the texture. When you're happy with the texture, stop. Mine won't go perfectly smooth, but I guess that's because I'm only using an ordinary blender.


If your blender is struggling to get it to go liquid, apparently adding a bit of melted coconut oil can help, though I can't vouch for it as I've never needed to.


Usage suggestions
  • Eat with a spoon
  • Spread on toast, I like it on toast with jam
  • Eat it with a spoon, did I already say that?
  • Add to smoothies
  • Use as icing for quickbreads or muffins 
  • Do not use as a butter substitute for cooking, remember, it's butter like peanut butter, not like dairy butter. 

Storage
Transfer to an airtight container and store in the pantry. I find these jars from Ikea to be cheap and the perfect size. In winter it will go hard, in summer it may go completely runny. If it's too hard to use, you can sit it in warm water for a bit. It will separate, so try to stir it back together before you use it. It should keep for at least a year.
 

Wonderbao - Reliving tastes of Japan with Chinese foods

22 July 2014

When I was in Japan, a steamed bun (called a man, rhymes with fun) with chocolate milk was my regular lunch when doing touristy things on my own. It was cheap and tasty. What more could I want? Oh yes, in retrospect, it would have been good if it had been vegan.

When I found out that there was a steamed bun shop in Melbourne with vegan options, I knew I had to try them, even if they make the mistake of calling them by the Chinese name of bao rather than the clearly superior Japanese term man.

Wonderbao - veggie lunch pack

Even though I wasn't actually that hungry, a quick look at the menu indicated that I had to order the veggie lunch pack - one of each of the three vegan options. How else was I to decide? These were the choi bao (shiitake mushrooms, tofu and veggies), the taro bao (taro, duh), and the fried silky tofu gua bao (with pickled mustard, coriander, sweet soy sauce and crushed peanuts). They also sell freshly made organic soy milk, hot or cold. Although I don't usually drink soy milk straight, I decided to be adventurous, and ordered a hot one.

Wonderbao - veggie lunch pack

I started with the fried silky tofu gua bao, the one that looks like a steamed bun taco. It was amazing, heaven for $4.20. I felt like I was back in Japan about to go and take photos of a temple, except that instead I was sitting looking out on a kinda cool old graffitied laneway, and the food was an order of magnitude better than any of nikuman (meat filled bun), kareman (curried meat filled bun) or pizzaman (meat and cheese filled bun) I ever bought from a Japanese kombini (convenience store). It beat the steamed buns I had from more authentic vendors too.

The choi bao was tasty enough but unremarkable, more in line with the quality I generally enjoyed in Japan, though I think I would have enjoyed it more if I'd eaten it first. The taro bao, a sweet bun that I fortunately managed to leave till last by accident, was not really my thing. I found the texture a bit unpleasant, probably because it reminded me of sweet red bean paste which I also don't like.

Wonderbao - hot soymilk

As for the soy milk, as I said before, I don't normally drink any non-dairy milks straight. I didn't used to enjoy dairy milk straight either. However, this stuff was fantastic, a very pleasant flavour in its own right, no chocolate powder required. I asked if they sell it to take home, but unfortunately, they only sell it by the cup in store. I think I might have to try making my own soy milk, because this was in an entirely different league to the stuff that comes in cartons at the supermarket.

Even though I wasn't thrilled with every item I tried, I'm going to rate Wonderbao 9/10, because for the gua bao and soymilk, the price to taste sensation ratio is phenomenal. Next time, I'll just order two gua baos and a soymilk. Mmmmmm.

Wonderbao on Urbanspoon

Simple tomato-free dahl

19 July 2014

This dahl is versatile and can be easily adapted to the vegetables you have on hand. I don't believe it's very traditional, but what does that matter? It also happens to be tomato free, which is handy if you're feeding a nightshade avoiding mother in law. Don't have one of those? Make this anyway, it's mild but flavoursome, and tastes much better than it looks.


Simple tomato-free dahl

Serves: 4-6
Adapted from: Best Recipes

Ingredients
  • 1 large onion, finely chopped
  • 3 cloves garlic, crushed
  • 1.5 teaspoon ginger, minced
  • 1 bay leaf 
  • 1 tablespoon oil
  • 1 cup red lentils (I used whole, but for a more traditional dahl texture, use split)
  • 2 teaspoons curry powder
  • 1 teaspoon turmeric
  • 3 cups vegetable stock, approximately 
  • about 1 cup diced sweet potato (about 1/2 a sweet potato)
  • about 1 cup diced pumpkin
  • 3-4 chopped button mushrooms
  • ½ red capsicum, chopped into strips
  • 400mL can coconut milk or cream
  • 2 cups chopped spinach or baby spinach leaves

Method
  1. In a large saucepan, heat the oil over medium heat, and add onion, ginger, garlic and the bay leaf, and fry until the onions are soft.
  2. Add the lentils, curry powder and turmeric and try for a couple of minutes, stirring continuously, until aromatic.
  3. Add the mushrooms, sweet potato, pumpkin and capsicum and saute for a few minutes.
  4. Add the stock and coconut milk.
  5. Bring to a simmer, then reduce heat and cook, uncovered, for 30-45 minutes, stirring occasionally. Add more water if required.
  6. When vegetables and lentils are cooked through and soft, add the spinach and stir through to wilt.
  7. Serve with brown rice, or whatever carb takes your fancy.

Vanilla berry porridge (vegan)

17 July 2014

To my mind, this porridge is nowhere near as good as my chocolate porridge, but I've been lead to believe that there are some people in the world, among them my brother and my husband, who actually prefer vanilla over chocolate. While I firmly believe this to be a very weird preference, they are family, so I must respect their preferences.

Until such a time as I can persuade them of the superiority of chocolate, here's a vanilla breakfast alternative.

Vanilla porridge with strawberries

Vanilla berry porridge

Serves: 1

Ingredients

  • 1 large overripe banana, or 1.5 small ones
  • Generous pinch shredded coconut (about 1 tablespoon)
  • Scant 1/3 cup rolled oats (you may want more if you have a large appetite in the morning)
  • 1 to 1 1/3 cups soymilk, or to desired consistency, I like mine pretty loose
  • 2 teaspoons vanilla 
  • a few grains of salt
  • Small handful of berries to top

Method
  1. Mash the banana
  2. Mashed banana
  3. Mix in coconut and oats
  4. Mashed banana with oats and coconut
  5. Mix in soymilk.
  6. Vanilla porridge, pre-cooking
  7. Cover with a plate, and microwave for 1 minute, then wander off and do something, turn on the computer, check blog feeds, get dressed or whatever, for about 3-5 minutes.
  8. Mix thoroughly, then return to microwave, and repeat step 4.
  9. Stir in vanilla
  10. Top with strawberries

River Kwai Thai and Burmese - a review

15 July 2014

Our local Thai restaurant - River Kwai, is not a vegetarian restaurant as such, but they're pretty accommodating. They state their vegetarian dishes to be 100% vegetarian: no shrimp paste, fish sauce or oyster sauce hiding in your supposedly vegetarian tofu dish.

Hunter and I have eaten there a number of times over the past couple of years, both eat in and takeaway, and the food has been consistently very good. I've only eaten from the Burmese menu once, and I didn't like it as much as the Thai. It's not the best Thai I've ever eaten, but it is definitely among the better ones. Last time we went was to celebrate Hunter getting a pay rise, which is when I took these photos.

Complimentary satay dipping sauce

The first thing to be aware of is that if you eat in, you get a complementary starter. For ages it was some chilli fish thing, maybe Thai Fishcakes. Anyway, neither Hunter nor I would eat it, so I tried to remember to ask them not to bring it to us, which always seemed to cause confusion. This time I forgot, but the appetizer had changed to a satay dipping sauce, so I enquired as to whether it contained fish sauce. This caused some confusion, with the waitress repeatedly asking me whether I was allergic to fish, and me repeatedly stating that I can't eat fish, but avoiding giving an answer on the allergy front, as I didn't want to a) lie, or b) have my desire to avoid fish be ignored since I wasn't allergic. Eventually, she went and checked in the kitchen, and came back to tell me that the sauce was fine, but the bready things for dipping contained prawn. So while Hunter dipped, I just ate the sauce with a spoon. Hunter was not impressed with me, but I could live with that since it was tasty.

To save you having to ask, both the veggie spring rolls and veggie curry puffs contain egg.

As usual, we aimed to have leftovers, so we ordered a Tofu Pad Thai minus the egg, as well as a curry each. I had the sad realization while eating the Pad Thai that Isa's Everyday Pad Thai is actually better than this one (if less authentic). This is not to say that River Kwai's Pad Thai is bad, but rather that Isa is an absolute genius.

Tofu pad thai - no egg

While Hunter had a Massaman Beef, not photographed because meat, I had a Green Curry. This was on the mild side for a green curry, but delicious, except that it had what I think were little spherical zucchinis in it, which weren't so great.

Tofu green curry

As I said earlier, we've eaten here a number of times, and never had a bad dish. I've tried all the Thai veggie curries, one of the veggie soups (can't remember which), and a few of the stir fries. Also, I should mention that the coconut rice has chunks of coconut meat in it, so please pay the extra dollar to upgrade to the coconut rice.

Overall rating is 7/10. Points deducted as it's a little on the expensive side for Thai, without the fish/oyster sauce and shrimp paste, some of their dishes are slightly lacking depth of flavour, which could be compensated for with a bit of creativity, and because while they advertise as vegetarian friendly, not all the staff understand that concept. Still great food though.

River Kwai on Urbanspoon

Pumpkin risotto (vegan)

13 July 2014

I never ate risotto as a child. Dad doesn't approve of mushy rice, and risotto falls into that category for him, so we just never ate it. While mushy rice with stir fry is rather gross, risotto is delicious. Sorry Dad, you're wrong on this one.


Pumpkin Risotto

Serves: 4-6
Veganized and otherwise improved from: Charlie Palmer

Notes
  • Because you use so much stock and it gets cooked down, if you don't use salt-reduced stock, it might end up crazy salty, especially if, like me, you always make a stronger than recommended stock. I haven't had problems with Massel stock (not salt reduced), but last time I used Vegeta and it was over-salty. You have been warned.
  • I've erred on the conservative side with the nutritional yeast. I suggest adding the 1/4 cup, and then adding extra to individual plates if desired.

Ingredients
  • 2 + 2 tablespoons olive oil (light, not virgin), divided
  • 2 medium onions, the first can be coarsely chopped, the second should be finely diced
  • 2 cloves garlic, minced
  • 600g pumpkin, peeled and diced
  • 3/4 cup dry white wine (or water)
  • 1 ½ teaspoons nutmeg
  • About 1 teaspoon white pepper
  • 7 cups salt-reduced vegetable stock
  • 2 ½ tablespoons vegan butter (optional)
  • 1 ½ cups arborio rice
  • ½ cup nutritional yeast

Method
  1. Heat 2 tablespoons of oil in a large saucepan (I usually use a wok, it's unconventional, but it works well). Add the coarsely chopped onions and the garlic,and cook over a moderate heat until the onions are translucent.
  2. Add the pumpkin, and cook, stirring frequently, until the pumpkin is just tender, about 7 minutes. 
  3. Stir in the wine, nutmeg, and white pepper and cook, stirring occasionally, until most of the liquid has evaporated, about 12 minutes. Remove from heat and allow to cool slightly.
  4. In a medium saucepan, cover the stock and bring to the boil, then reduce heat so it's just simmering. 
  5. Purée the pumpkin mixture. I usually a stick mixer, but you can use a food processor or blender. I like to leave it with a bit of texture, but if you prefer smooth, do that. Set aside within easy reach. 
  6. Wipe out the pan/wok you used for the pumpkin, and add the remaining oil. When it's hot, add the rice and the remaining onions and cook over moderately high heat, stirring with a wooden spoon, until the onions are translucent, about 7 minutes.
  7. Add a ladle-full of the hot stock and cook, stirring constantly, until all of the liquid has been absorbed. Sorry, no photos from here on, because of the need for constant stirring.
  8. Add about 2/3 of the remaining stock, a ladle-full at a time, stirring constantly, and waiting until the stock is almost completely absorbed before adding the next. The pan should be hot enough that the stock continues to simmer when it hits the pan, but isn't rapidly boiling. This should take about 20 minutes. 
  9. Stir in the pumpkin mixture, and stir for a few minutes until it thickens. 
  10. Continue adding the remaining stock, again a ladle-full at a time, again waiting until most of the liquid is absorbed, though it will be looser now. This should take approximately 5 minutes longer.
  11. Stir in the vegan butter and nutritional yeast. Serve immediately.

Avocado "cheese" wrap (vegan)

11 July 2014

I just stumbled upon this combination one day when I threw together whatever I could find for lunch. The combination tastes way better than the simple ingredients would imply. The mixture of avocado and nutritional yeast wouldn't fool anyone into thinking it was cheese, and yet it makes a surprisingly satisfying cheese alternative.


Enjoy as a snack or a light lunch.

Avocado "cheese" wrap

Ingredients
  • 1 tortilla
  • 1/2 a large avocado, or 1 small avocado (soft)
  • freshly ground sea salt (to taste)
  • 1-2 tablespoons nutritional yeast
Method
  • Spread the tortilla with a generous layer of avocado, add salt if desired, and sprinkle with nutritional yeast
  • Stick under a low grill for a few minutes, until it turns golden brown, but before the edges of the tortilla turn black!
  • Roll up and eat!

Las Vegan Cafe - a review

09 July 2014

Las Vegan Cafe on UrbanspoonWhile picking up my exciting new 100% vegan shoes, I stopped in to have lunch at the nearby Las Vegan Cafe. There are actually two shops that share the premises, the cafe at the front, and Vegan Style, a (mostly) shoe shop at the back. This was dangerous. I visited Vegan Style while I was waiting for my food, and ended up falling in love with a pair of teal Mary Janes. I couldn't justify buying (and carrying) two pairs of shoes in one day, but I think I will have to go back for them... I've gone so long without buying shoes, I can buy these too, right?

Anyway, back to the food. Overwhelmed by the choices on the menu (i.e. overwhelmed by having choices), I asked for recommendations, and ended up getting crispy rice balls with satay sauce. At $12, it was one of the most expensive items on the menu.


It tasty enough, but nothing to get excited about. I'm going to give it a rating of 5/10. I'm not sure if that's too harsh, but I feel that it was around the minimum I would expect from a meal out, and as I'm new to this reviewing business, I don't want to start too high. The staff were friendly enough, and the cafe space was pleasant enough, though not particularly inviting.

I was also excited to order a hot chocolate, something that I very rarely buy any more since I'm not keen on grilling shop people about whether or not there is milk in the chocolate powder. It was, however, quite disappointing. I think it was made on almond milk, at any rate, it tasted very watery.

On the way out, I allowed myself to be tempted by a muffin - strawberry and lime. Despite the exciting sounding flavour combination, the muffin was less so. It was rather dry, and although I was excited to be eating an actual bought vegan muffin, I have made better (though admittedly not of that flavour). Actually, that seems like a good challenge, strawberry and lime muffins are now on the radar, as soon as I unpack my muffin tins, as soon as we actually move...

Overall, the food was unexciting but acceptable. I'll probably still give them another try next time I'm in the vicinity.

Spiced blueberry porridge

07 July 2014

A few weeks ago, disaster struck. I was out of cocoa powder. I couldn't have my favourite everyday breakfast. After a brief period of denial, anger and depression (I skipped the bargaining stage), I accepted that there was no cocoa to be had. I therefore set about finding a way of making chocolate-free but nevertheless tasty porridge, and hit upon spiced blueberry porridge.


Spiced blueberry porridge

Serves: 1

Ingredients

  • 1 large overripe banana, or 1.5 small ones
  • 1/8 teaspoon mixed spice (two shakes)
  • 1/16 teaspoon ground cardamom (one shake)
  • Generous pinch shredded coconut (about 1 tablespoon)
  • Scant 1/3 cup rolled oats (you may want more if you have a large appetite in the morning)
  • 1 cup soymilk, or to desired consistency
  • 1/2 teaspoon vanilla
  • Small handful of blueberries to top

Method
  1. Mash the banana.
  2. Mix in the spices, coconut and oats.
  3. Mix in soymilk.
  4. Cover with a plate, and microwave for 1 minute, then wander off and do something, turn on the computer, check blog feeds, get dressed or whatever, for about 3-5 minutes.
  5. Mix thoroughly, then return to microwave, and repeat step 4.
  6. Stir in vanilla
  7. Top with blueberries. You may wish to return to microwave for a further 30 seconds, or just stir through and let the heat from the porridge melt them.

Vegan apple pancakes

05 July 2014

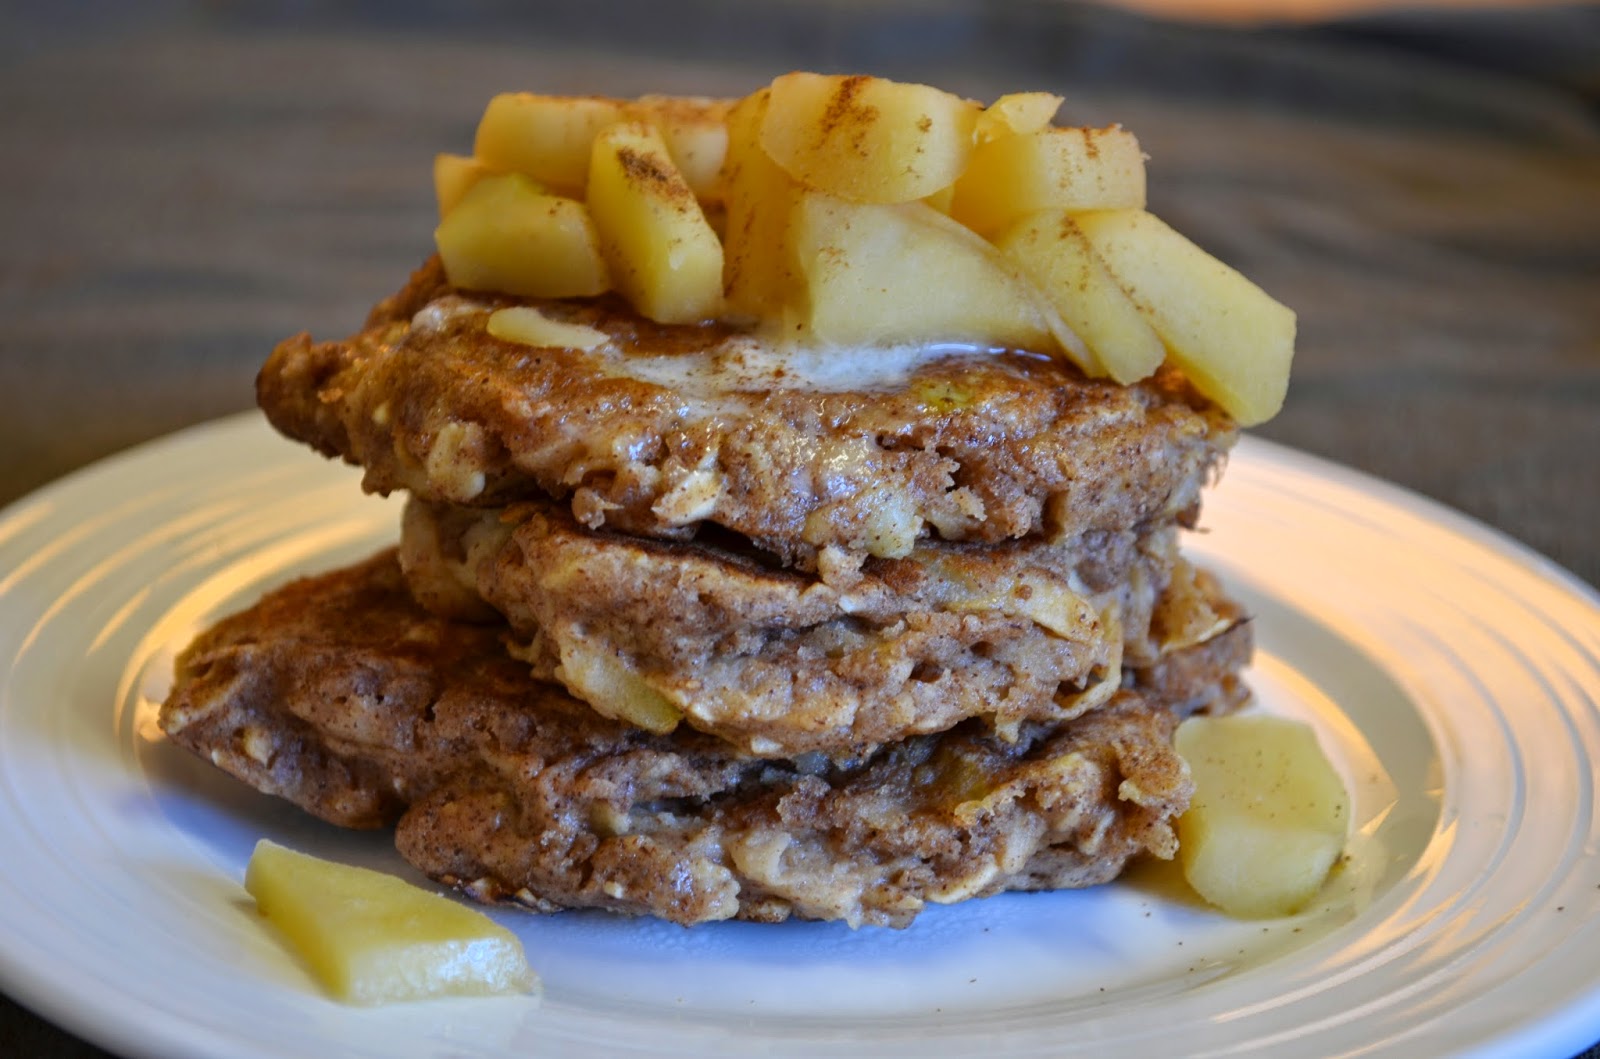
Weekends are for slightly more involved breakfasts. During semester, I rarely have the energy, but now that I'm on break, I get to have fun. Enter Apple Pie Pancakes from Chocolate Covered Katie, topped with vegan butter and stewed apples:

Apple pancakes with vegan butter and stewed apple

I used plain flour, grated the apple instead of finely slicing it (just over half an apple), used sugar rather than the stevia, and included the coconut oil. They were delicious, an opinion seconded by the resident omnivore. My only complaint is that what you see in the pictures is all that the recipe made, so Hunter and I only had 1.5 pancakes each. I'm not sure we would have managed to finish a double batch as they were quite thick, but, then again, who objects to leftover pancakes? Next time, I'll make double, which should serve 3 light eaters, or 2 hungry people.

Apple pancakes with vegan butter and stewed apple

I have new shoes! (Vegan Wares - Victoria)

03 July 2014

Vegan Wares - Victoria (Dante) - side view

I have new shoes! The Victoria from Vegan Wares. I picked them up on Tuesday, and the excitement hasn't worn off yet. Except one pair of sandles, a Christmas present from Mum and also from Vegan Wares, I haven't bought any shoes in over 3 years. Firstly, it was being in Japan with too-large feet, and then going vegetarian meant I put shoes in the "too hard basket". I finally mustered the energy to order some shoes late last winter, but ordered them in a colour that wasn't in stock, and then the shoe fabric got caught up in a still continuing customs saga in India. Then summer came, so I went back to ignoring shoes.

Vegan Wares - Victoria (Dante) - back view

However, winter is back in earnest, and you can only ignore shoes for so long before they start falling apart on you. I've been wearing my knee-high black boots as every-day shoes; they're actually my only pair of closed in shoes (except my cross-trainers), that don't have holes that weren't part of the original design. I've still been occasionally wearing two other pairs of shoes despite their holes, but that does carry the risk of making me look somewhat more of a hippy than I'm going for.

Vegan Wares - Victoria (Dante) - front view

Vegan Wares is a Melbourne-based shoe shop that actually make their shoes on site. Because they make the shoes themselves, I was able to have them customized to have a bit of extra width. I've always struggled to find shoes that don't kill my wider-than-average feet, one of the reasons I've put off shoe shopping for so long. I thought finding shoes that were wide enough and attractive shoes and vegan would just be impossible. Thankfully, it's not. Apart from the extra width, I just went with the standard black, but I could have chosen from a number of different colours, as well as contrasting stitching options. The semi-custom shoes took a bit over 3 weeks to be completed. To be honest, the fit of my custom shoes was actually slightly different across the top of the foot than the off-the shelf shoe (I double checked by trying on the original shoe again), but I don't think that's going to be a problem.

Vegan Wares - Victoria (Dante) - front/side view

They're the most expensive shoes I've ever bought, but they seem comfortable, they have a reputation for lasting very well, and they're also designed to be repaired, thus further prolonging the lifespan. The high quality microfibre "leather" is supposed to very closely replicate the properties of leather - it's breathable, water repellent, and is supposed to even more durable than leather.

Vegan Wares - Victoria (Dante) - front view

I haven't worn them long enough to judge if they're genuinely comfortable, or to report on the wear quality of the "leather". I'll report back after a few months to give a review on this. In the meantime, I have pretty, ethical shoes!

Vegan Wares - Victoria (Dante) - rear view


As an aside, it is really really difficult to take decent close-up photos of shoes while you are wearing them!

Ridiculously simple stewed apples

02 July 2014

This is so simple that it doesn't really even qualify as a recipe. Yet the first time I tried making stewed apples, I Googled it and got bad advice and ended up having to drain my boiled, overly sweet apples. So these instructions may be of use to someone.

Stewed apples sprinked with cinnamon

Make up a big batch (I did 5 large apples), and eat them for dessert as is, or with ice-cream and/or custard. Alternatively, I'll be referencing these instructions in a few up and coming posts.

Stewed apples

Ingredients
  • Apples
That's it, really. You can use just about any type of apple. I usually use whatever apples have been forgotten in my fridge for a few months and are suspected to be beyond eating fresh. You shouldn't need any sugar, but feel free to add a bit if you think it's needed.

Method
  1. Peel, core and chop your apples. If you miss some peel, it's fine, and if your apple chunks are different sizes, this is also fine, as it will give you some textural variety. Add to a saucepan with a few tablespoons of water, just to stop it sticking.
  2. Diced apples
  3. Cook over low heat, covered, for about 30 minutes depending on desired texture, stirring occasionally
  4. Stewed apples
  5. Leave to sit uncovered for about 5 minutes to allow the apple to reabsorb any excess liquid 
Stewed apples sprinked with cinnamon